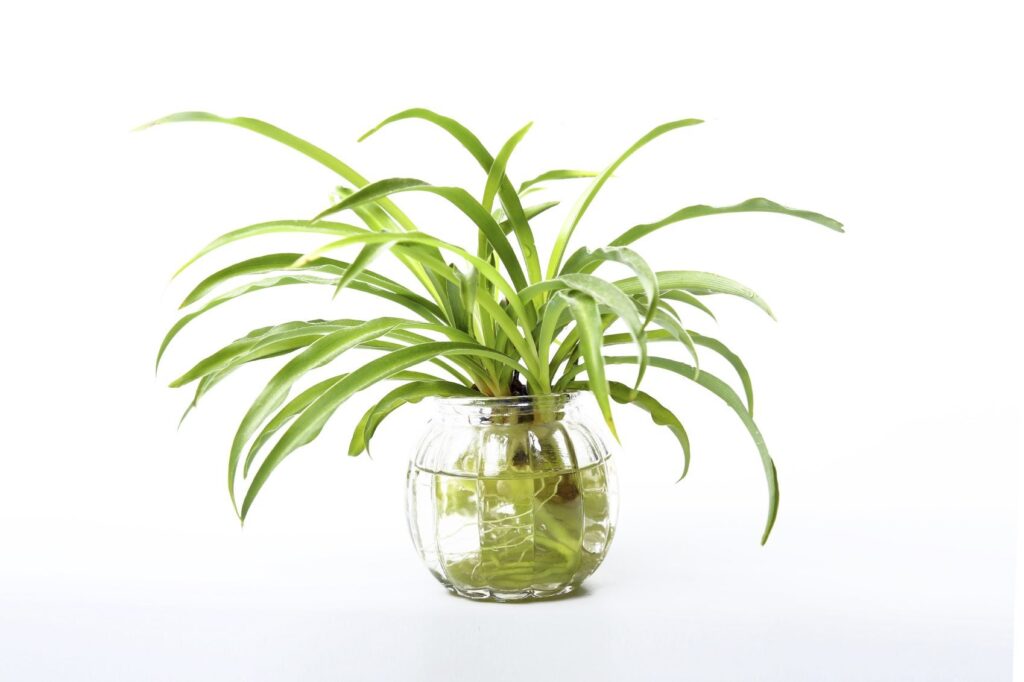
Spider plants (Chlorophytum comosum) are beloved for their graceful arching leaves and air-purifying properties, making them a popular choice for indoor gardening enthusiasts. While traditionally grown in soil, spider plants can also thrive when propagated in water, offering a unique and visually striking alternative for plant lovers. In this article, we explore the steps to successfully grow spider plants in water, from selecting the right specimen to caring for the established plant.
Selecting a Suitable Spider Plant
A. Choosing a Healthy Spider Plant Specimen
To start the water propagation process, it’s essential to select a healthy spider plant specimen with robust foliage and strong root systems. Look for plants with vibrant green leaves and no signs of discoloration, pest infestations, or disease. Opt for a spider plant that has matured sufficiently but isn’t overly large, as smaller offsets are more suitable for water propagation.
Before proceeding, inspect the plant carefully for any pests or diseases that may affect its health or spread to other plants. Trim away any damaged or discolored foliage using clean, sharp scissors to promote healthy growth and prevent potential issues during propagation.
Setting Up the Water Propagation Environment
A. Selecting an Appropriate Container
Choose a suitable container for water propagation, ensuring it is clean, transparent, and large enough to accommodate the spider plant cuttings. Glass jars, vases, or propagation tubes are popular choices for displaying the roots of the growing plant. Consider the size and shape of the container, opting for one with a wide opening to allow ample airflow and easy access for maintenance.
When preparing the water for propagation, use filtered or distilled water to minimize the risk of contamination and ensure optimal root development. Optionally, add a small amount of water-soluble fertilizer or rooting hormone to provide essential nutrients and promote healthy growth.
Place the container in a location with bright, indirect light, avoiding direct sunlight to prevent algae growth and overheating. Positioning the container near a window or under artificial grow lights can provide the necessary light levels for successful water propagation.
Propagating Spider Plant in Water
A. Submerging the Spider Plant Cuttings
Using clean, sharp scissors, trim healthy spider plant offsets or baby spider plants (also known as spiderettes) from the parent plant, ensuring each cutting has several leaves and a portion of stem. Remove any lower leaves from the cuttings to prevent them from rotting in the water.
Carefully place the spider plant cuttings in the prepared container, submerging the trimmed stems in water while allowing the leaves to remain above the waterline. Arrange the cuttings evenly in the container, ensuring they are adequately spaced to prevent overcrowding and promote healthy root development.
Monitor the container regularly for signs of root growth, observing the cuttings for the emergence of white, thread-like roots from the submerged stems. Change the water every few days to maintain clarity and prevent stagnation, ensuring the cuttings have access to oxygen and nutrients for optimal growth.
Caring for Spider Plant in Water
A. Providing Appropriate Water and Nutrient Levels
Check the water level in the container regularly, topping up as needed to ensure the cuttings remain submerged and hydrated. Avoid allowing the water level to drop below the base of the cuttings, as this can hinder root development and cause the plants to wilt.
Supplement the water with a diluted liquid fertilizer formulated for houseplants every two to four weeks to provide essential nutrients for healthy growth. Alternatively, add a small amount of aquarium water or hydroponic nutrient solution to the container to support robust root development and foliage production.
Maintain optimal environmental conditions for the spider plant cuttings, ensuring they are exposed to bright, indirect light and moderate humidity levels. Avoid placing the container in direct sunlight or near sources of heat or drafts, as this can stress the plants and impede growth.
Troubleshooting Common Issues
A. Addressing Root Rot or Fungal Infections
If you notice signs of root rot, such as mushy or discolored roots, remove the affected cuttings from the water immediately and trim away any damaged tissue with clean scissors. Rinse the remaining healthy roots under running water to remove any debris or contaminants, then replant the cuttings in fresh water.
To prevent fungal infections, ensure the container is clean and free from debris, and change the water regularly to prevent stagnation. Provide adequate airflow around the container and avoid overcrowding the cuttings to minimize the risk of fungal growth.
Adjust your care regimen based on the response of the spider plant cuttings, making necessary changes to address any issues or deficiencies. With proper attention and care, your spider plant cuttings will thrive in water, developing strong roots and lush foliage over time.
Conclusion
Growing spider plants in water offers a unique and visually striking alternative to traditional soil cultivation, allowing plant enthusiasts to enjoy the beauty of these graceful plants in a new way. By following the steps outlined in this guide, you can successfully propagate and care for spider plant cuttings in water, creating a stunning display of lush foliage and vibrant greenery in your home or garden. With patience, attention to detail, and a little bit of TLC, you’ll be rewarded with thriving spider plants that bring joy and beauty to any space.
