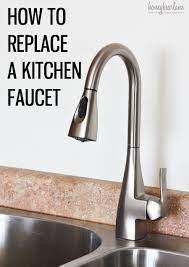
Replacing a kitchen faucet with a sprayer can be a rewarding DIY project that enhances the functionality and aesthetics of your kitchen space. Whether you’re upgrading an outdated faucet or simply seeking to add a sprayer for more convenient dishwashing, this guide will walk you through the steps to accomplish this task efficiently and effectively.
Preparation
Before beginning the replacement process, gather the necessary tools and materials:
- New kitchen faucet with sprayer
- Adjustable wrench
- Basin wrench
- Plumber’s tape
- Bucket or towels
- Safety goggles
Step-by-Step Guide
Follow these steps to replace your kitchen faucet with a sprayer:
-
Turn off the Water: Locate the shut-off valves under the sink and turn them clockwise to shut off the water supply.
-
Disconnect Supply Lines: Use an adjustable wrench to disconnect the hot and cold water supply lines from the faucet.
-
Remove Old Faucet: Use a basin wrench to loosen and remove the nuts securing the old faucet to the sink. Disconnect any remaining connections.
-
Clean the Area: Wipe down the sink area to remove any residue or debris left behind by the old faucet.
-
Install New Faucet: Follow the manufacturer’s instructions to install the new faucet. Use plumber’s tape to secure connections and prevent leaks.
-
Connect Supply Lines: Attach the hot and cold water supply lines to the corresponding valves on the new faucet. Tighten securely with an adjustable wrench.
-
Install Sprayer: If the sprayer is separate from the faucet, follow the manufacturer’s instructions to install it. Most sprayers simply screw onto the hose provided with the faucet.
-
Test for Leaks: Turn on the water supply and test the new faucet and sprayer for leaks. Tighten connections as needed.
-
Secure Components: Once everything is functioning properly, secure any loose components and tidy up the area under the sink.
-
Enjoy Your New Faucet: With your new kitchen faucet and sprayer installed, enjoy the enhanced functionality and appearance of your kitchen space.
Frequently Asked Questions (FAQs)
-
Can I replace my kitchen faucet myself? Yes, replacing a kitchen faucet is a manageable DIY project for most homeowners. However, if you encounter any difficulties or are unsure about certain steps, consider consulting a professional plumber.
-
Do I need any special tools to replace a kitchen faucet? Basic tools such as an adjustable wrench and a basin wrench are typically sufficient for replacing a kitchen faucet. These tools can be found at most hardware stores.
-
How long does it take to replace a kitchen faucet? The time required to replace a kitchen faucet varies depending on factors such as the complexity of the installation and any unforeseen issues encountered. On average, it can take anywhere from 1 to 3 hours to complete the job.
-
Do I need to shut off the main water supply to replace a kitchen faucet? It is usually sufficient to shut off the water supply valves located under the sink. However, if there are no individual shut-off valves, you may need to shut off the main water supply to the house.
-
What should I do if I encounter a stubborn nut or bolt during the removal process? Apply penetrating oil to the nut or bolt and allow it to sit for a few minutes before attempting to loosen it again. If necessary, use additional tools such as a pipe wrench for extra leverage.
-
Can I reuse the supply lines from my old faucet? It is generally recommended to install new supply lines when replacing a kitchen faucet to ensure optimal performance and minimize the risk of leaks.
-
How do I choose the right kitchen faucet for my sink? Consider factors such as the size and configuration of your sink, as well as your personal preferences in terms of style and functionality. Take measurements and research different faucet options to find the best fit for your needs.
-
What should I do if I notice a leak after installing the new faucet? Double-check all connections to ensure they are properly tightened. If the leak persists, try applying additional plumber’s tape to the affected area. If the problem persists, consider seeking assistance from a professional plumber.
-
Can I install a kitchen faucet with a sprayer if my sink doesn’t have a pre-drilled hole for it? Yes, there are options available for installing a sprayer without a pre-drilled hole. You can choose a faucet with an integrated sprayer or explore alternative installation methods such as a deck plate or countertop-mounted sprayer.
-
Are there any special maintenance requirements for kitchen faucets with sprayers? Regular maintenance such as cleaning the aerator and sprayer head can help prevent buildup and maintain optimal performance. Additionally, be mindful of any signs of leaks or corrosion and address them promptly to prevent further damage.
By following these steps and guidelines, you can successfully replace your kitchen faucet with a sprayer, enhancing both the functionality and appearance of your kitchen space. Remember to take your time, follow instructions carefully, and don’t hesitate to seek assistance if needed. With a little effort and the right tools, you can accomplish this DIY project with confidence and satisfaction.
